Friday, September 29, 2017

North Iron Mountain and Ramona Overlook Peak

Hiked: 9/29/2017
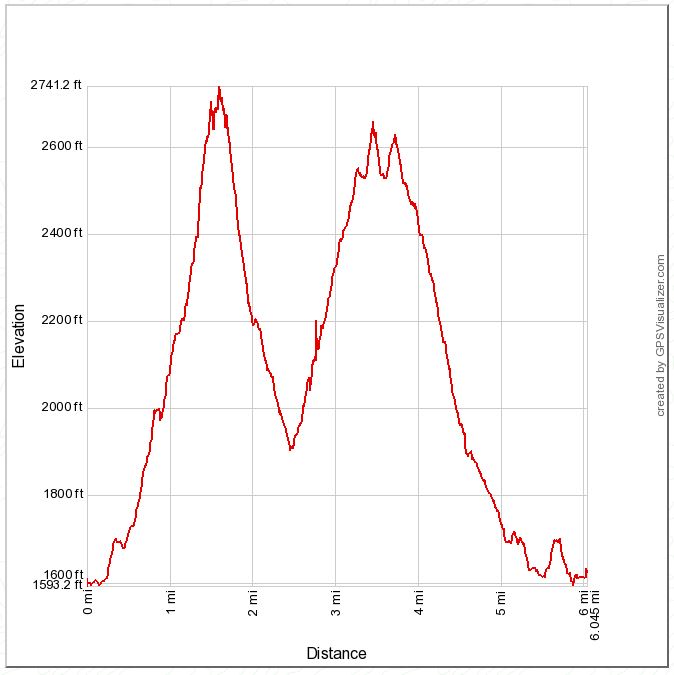
Distance: 6 miles round trip on trail
Summit Elevation: 2703' (North Iron), 2635' (Ramona)
Elevation Gain: 2055'
Elevation Gain (in Empire State Buildings): 1.64
Round trip time: 3 hours 35 minutes
Recommended water: 64 oz.
Parking/Fees: Free at Ellie Lane trailhead
Difficulty: Moderate (class 5 summit on North Iron)

North Iron Mountain in Poway is wedged between Iron Mountain and Woodson Mountain. It is higher than Iron, lower than Woodson, and far more difficult than either, sporting a tricky 50' class 5 summit block. TLDR: About 3 hours of relaxed single track and 20 minutes of abject terror. One of the great things about the Poway area is the cluster of small but interesting peaks and it's only about an hour from my house. I parked at the Ellie Lane trailhead and took the trail that runs between North Iron and Mt. Ellie. It climbs to the saddle where Table Rock marks the beginning of the use trail to North Iron. The use trail is in good shape with almost no bushwhacking.

Don't get lost now
Show no fear
And you'll be ready
For a new frontier
-- Monster Magnet, God Says No

The North Iron summit is made up of several house sized boulders piled on one another. I circled the peak and there were several possibilities for reaching the top. I had spoken to Eric Su about it and he provided valuable beta on a class 5 roped route from the northeast. (Thanks!) Eric's route required lassoing a chicken head with webbing about 12' above a class 3 ledge, then a relatively short ascent from there. Bob Burd's recently discovered unroped class 5 route from the south involved four sections: 1) climbing a tree to get above the high angle rock, 2) a class 3 slab, 3) a class 2 traverse, 4) a class 3+ ascent on the final block. (Thanks!) Lastly, I found a ~5.5 crack system on the north side that looked reasonable if you could get a top rope anchored on the other side. The top of the crack would put you at the traverse on Bob's route, however the slabs were hollow and might break off. I had my rope and gear in the car, but out of laziness decided I would try Bob's route first and if I failed, I would go back and haul the rope up for Eric's route. I packed my rock shoes in and highly recommend them regardless of the route chosen. As Morpheus said, "There is a difference between knowing the path and walking the path."


North Iron summit block from below


Table Rock and Mt. Ellie


Unroped summit block route

At the base of the tree below the North Iron summit, I ate some almond butter, put on my rock shoes and started climbing the tree. It was too far away from the rock for me to stem it as Bob had done. I literally went out on a limb, dismounted into a 60 degree crack and used the tree to pull myself on a 2' ledge about 15' above the ground. Even though this was the crux, the next section was not easy. A short friction move got me below the next slab where I briefly considered turning around. Did I really want to do this? After a short internal debate, I decided to continue going up, using an under cling on the top slab. The traverse was easy class 2 as expected along the south side to the base of the final summit block. This was the only section without serious exposure. While climbing over the traverse, my camera fell out of my pocket and tumbled over the precipice. I had dropped it on Peak 3339 only two weeks ago and this time it was finished. I found it later with the battery and memory card half ejected. It was not lost on me that a slip would have left my organs half ejected at the same crash site. I paused at the base of the final block and had another internal debate. There were decent holds on the final block but they weren't jugs. I only had another 20' of exposed class 3+ to gain the summit. My hesitation only lasted a few seconds but it seemed excruciatingly long. I still had my Ricoh Theta S 360 camera and it would have to suffice for the rest of the summit photos. I took a couple of 360s at the base, then started moving up again. The holds were plentiful but required attention. I was somewhat relieved when I topped out, but not exuberant. I knew I had to descend. The summit was larger than expected with plenty of room for several people. I stood and walked around, unable to locate Bob's register placed in April. When I saw the boulder and anchor on Eric's route, I wished I had come up that way so I could rappel down that way. I shook my head, took some 360s on the summit, then steeled myself for the descent. I started down with my left side to the rock. This was a pretty good compromise to maintain stability and still see the holds below me. It was a slow descent off the summit followed by an easy traverse back to the slabs above the tree. I thought getting back into the tree might be difficult, but I was able to walk myself down to a point where I could place my right foot between two branches, then get back on the main limb. A few moves later and I was back on the ground. I found my camera with splayed guts and put it back together. The shutter mechanism was broken. I used my phone to take photos the rest of the trip.


2' ledge at the top of the crack


Out on a limb


I climbed the limb on the right, then dismounted left into the crack


Lower slab section from the ledge


Looking down from the 2' ledge


Traverse section, just before dropping my camera (RIP)


Final summit block (screen grab from 360)


Looking north to Woodson (screen grab from 360)


Looking south to Iron Mountain and Ramona Overlook (screen grab from 360)


Camera crash site

I wasn't in the mood for the mild bushwhack up Mt. Ellie, but I did want to head over to Ramona Overlook Peak. I got back on the trail and followed it up to the point where the trail started to drop. There was a good use trail there heading to Ramona Overlook Peak. The views were awesome in all directions and I appreciated the walk up. I finally started to relax and sat down for lunch. After hanging out a while, I climbed the unnamed peaklet behind Ramona then headed back to the car. For the return trip, I followed the trail south of Mt. Ellie and it eventually curved back to intersect the starting trail. Despite the struggle, I was happy to have some iron back in my diet, even if it was San Diego iron. I was also happy to get the summit block. If I ever climb it again, it will be on Eric's roped route.


Approaching Ramona Overlook Peak


View from Ramona Overlook Peak


A quick look at the other possible routes...


Eric's route, the boulder that must be lassoed from the class 3 ledge

Update: 12/16/2017
I returned with my friend Terry to attempt the roped route. We climbed on the large slanted boulder and spent 45 minutes trying to lasso it. We each tried many times with no luck. I had some webbing attached to the rope. We might have been able to get it with just the rope, but I was concerned the rope might get cut by sharp, unseen edges. The bottom line is we failed on the roped route.


The hollow crack system on the north side


Would you like to know more...?

Other Trip Reports:
North Iron Mountain, Mt. Ellie, Ramona Overlook Peak (Bob Burd)
North Iron Mountain (Peaks for Freaks)

Sunday, September 24, 2017

Santiago and Modjeska via Telephone Ridge

HPS Star Emblem Peak
Hiked: 9/23/2017
Distance: 15.2 miles round trip on trail and cross country
Summit Elevation: 5687' (Santiago), 5496' (Modjeska)
Elevation Gain: 5432'
Elevation Gain (in Empire State Buildings): 4.34
Round trip time: 8 hours 25 minutes
Recommended water: 128 oz.
Parking/Fees: Free on Trabuco Creek Road
Difficulty: Strenuous

Before starting the fall semester, Eric asked if I had any off-trail or route finding challenges in the works. One that had been rolling around in my head a while was taking Telephone Ridge to Santiago Peak and Modjeska Peak with a possible side trip to "The Scar". Santiago is the high point in Orange County and a P4k that Eric hadn't done. The Scar is a massive drainage channel on the southeast face of Santiago. It is visible on clear days from miles away, but isolated and hard to reach. From satellite imagery, it looked like a high angle packed dirt chute.

We started on Trabuco Creek Road (33.6717554, -117.5593322) around sunrise. I led us up a steep, trashy gully with a rusted out car that probably didn't save us any time. I recommend sticking to the road at the start. The road climbs up to the Joplin Trail and we followed it east to a clearing where it splits. At the clearing, the Joplin trail drops down to Old Camp while a maintenance road continues right toward the Telephone Pole Ridge. We cached a little water there for the return trip, the took the road until it ended. The weather was unusually cool for this time of year and neither of us ended up using all the water we brought. At the end of road, we dropped about 75' down to the base of Telephone Ridge. The brush was mostly light and there was a reasonable trail to follow beneath the poles. Although not recent, there were occasional signs of trail maintenance. The ridge climb was really pleasant and views back into Orange County got better by the minute. Eric found a snake skin under a rock, but it was too cool for the snakes to be out. The ridge would probably be snakey in warm weather. When we got to the spot we had planned to leave the ridge toward The Scar, we were already in fairly dense brush. It was worse off the ridge and pretty far away, so we made the game time decision to skip it. As we got close to the road, the trail drifted right of the poles into thick buckthorn. We thought maybe we had gotten off track and bushwhacked back under the poles only to find worse conditions. We headed back to the buckthorn and pushed our way through a nasty 100' section before it opened up again. We emerged onto the road and took it to the tower filled summit. Not content with the terrestrial summit, Eric sought better views but that is a story for another time. We walked to a view point I had not visited on my previous visits and checked out some view tubes. The tubes were ineffective with the usual haze covering the OC. Clouds started rising from below and would end up keeping us cool later on the descent.


Top of Santiago near the start


Shortcut gully, 3/10 would not recommend


Telephone Pole Ridge


Staying under the poles


Trabuco Canyon and the OC from the ridge


Snake shed


The tower closest to the summit

Next we headed to Modjeska. I knew there was a trail that led down to the saddle between the peaks but had not been on it before. We followed my GPS track down the other side of the summit to where it started. The trail was surprising good all the way to the saddle. There is a good trail to Modjeska that also leaves saddle on Main Divide Road. A newer sign had been placed on Modjeska, but some loser had sawn it off and taken it home. On the summit, we met an odd motorcycle rider who felt compelled to explain to us the details of the government's weather warfare program, chemtrails, and the end times. We did our best not to trigger him while resting up for the descent. We returned down the trail to the saddle, then took the Joplin trail down into the canyon. The trail was slightly rutted in some places from mountain bikes, but otherwise was in fine condition. There was a lot of shade on the trail from deciduous tree coverage. There was also a lot of poison oak, often growing into the trail. I am pretty sure I brushed it several times but probably not enough to cause a reaction. It remained cool in the shade under party cloudy skies. We reached Old Camp and there wasn't much to it. It is an unmaintained campground with an abandoned broken lawn chair. We crossed water in a creek not far from the camp, but the creek next to the camp was dry. On the way out, we picked up our water cache, which turned out to be unnecessary, and hiked back to the car. This was my third visit each to Santiago and Modjeska, but my first time to summit both on the same trip. The scar remains elusive. A descent from the road seems like the best chance to reach it, although an ascent from the bottom of the canyon is a possibility. Telephone Ridge is now my favorite route to Santiago. It is guaranteed to be uncrowded and offers views along the way that can't be matched by the Holy Jim trail or Main Divide.


Start of the trail down to the saddle

Wrecked truck on the trail

Modejeska from the trail

Ridge use trail to Modjeska

Santiago from Modjeska

Clouds building to the west

Starting down the Joplin Trail


Zoomed view of The Scar from the cache clearing


Would you like to know more...?

Other Trip Reports:
Santiago Powerline Ridge (Mountaineering Review)

Saturday, September 16, 2017

Little Stonewall Peak

Hiked: 9/15/2017
Distance: 4.2 miles round trip on trail and cross country
Summit Elevation: 5250'
Elevation Gain: 768'
Elevation Gain (in Empire State Buildings): 0.61
Round trip time: 2 hours
Recommended water: 48 oz.
Parking/Fees: Free on Highway 79 at Trout Pond parking lot
Difficulty: Moderate (route finding, summit block)

I did a 4-peak tour of the Cuyamaca area in 2016 and climbed Stonewall, but didn't feel like adding Little Stonewall at the time. This day it was a bonus hike for me on the way home from Peak 3339. I parked at the free Trout Pond parking lot about 2 miles north of the main park entrance. I knew there were connecting trails to the Stonewall Peak trail on this side but didn't know their names. The one leaving the parking lot was the Marty Minshall trail. Less than half a mile later, I turned right on the Los Caballos trail. Another 0.4 miles got me to a wooden fence that I followed, taking a left at the next junction, then right again onto the Stonewall Peak trail. Switchbacks led up the northwest side of Stonewall to the saddle between Stonewall and Little Stonewall. I left the trail looking at what appeared to be a semi-open cross country area. The true summit of Little Stonewall was not visible from below. At the bottom of the saddle is a pretty good use trail. As you scramble higher into the boulders, the brush gets dense and the use trail harder to follow. Much of the higher brush is buckthorn. There were helpful cairns along the way, but I had to back out of the brush a few times before finding my way to the summit area. The summit block consists of two granite plates next to each other.


Little Stonewall left, Stonewall Peak right


Leaving the trail from the saddle


Boulders and brush


Little Stonewall summit block

The summit ascent was not too difficult, requiring one easy stem between the plates to mount the higher of the two. There wasn't an easy way to stand on the summit, so I straddled it like a horse. In the top crack was an altoids can with a small register, placed in May, 2017. There might have been another register around the summit somewhere, but a quick search didn't turn up anything. I signed the register on top, then dropped down for a breather. The way down was not any more clear than the way up, with some trial and error. Climbing onto a low boulder, I heard a courtesy rattle from a juvenile speckled rattlensnake at the base. It slithered to the other side where I got a partial photo of it. It was perfectly colored to match the granite and I never saw it until it moved. Back on the use trail, I was about 50' from the main trail when I got more than a courtesy rattle from the bush I was walking through. This rattlesnake was giving me a stern warning and was close enough to have hit me if he wanted. I leaped as far out of the bush as I could, but my reflexes would not have saved me if he had been in a bitey mood. Two rattlesnakes within a quarter mile put me on the defensive. I wonder how many others I walked by oblivious to the danger. Little Stonewall was a great cap on the day. Although my route finding was not perfect, I had a sizable, satisying day scrambling around San Diego County.


Mounting the summit


Small register in an altoids can


Stonewall Peak from Little Stonewall


Middle Peak and Lake Cuyamaca right


Fangs of sunlight over the lower summit


Juvie speckled rattlesnake, thankfully not feeling bitey


Horse people