Hiked: 10/28/2012 (x4)
Distance: 7.2 miles round trip on trail and dirt road
Summit Elevation: 3803'
Prominence: 280'
Elevation Gain: 1953'
Elevation Gain (in Empire State Buildings): 1.56
Round trip time: 2 hours 30 minutes
Recommended water: 80 oz.
Parking/Fees: Adventure Pass
Difficulty: Moderate
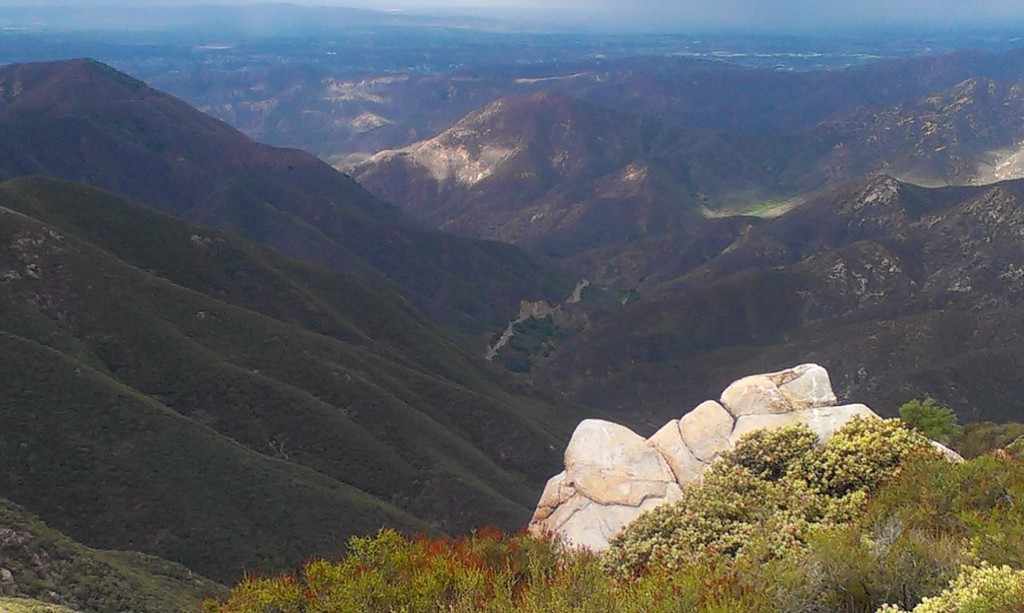
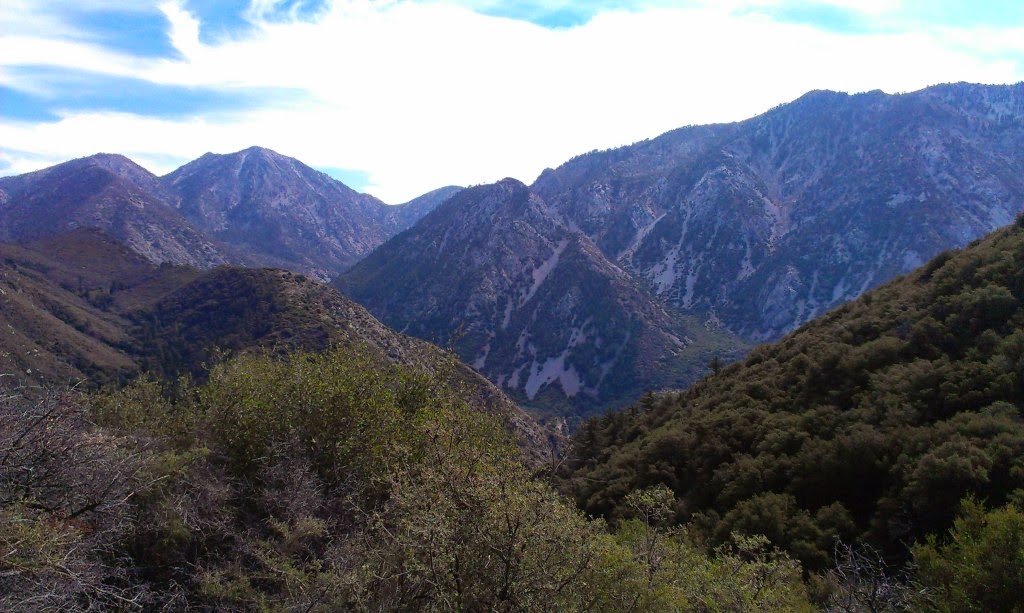
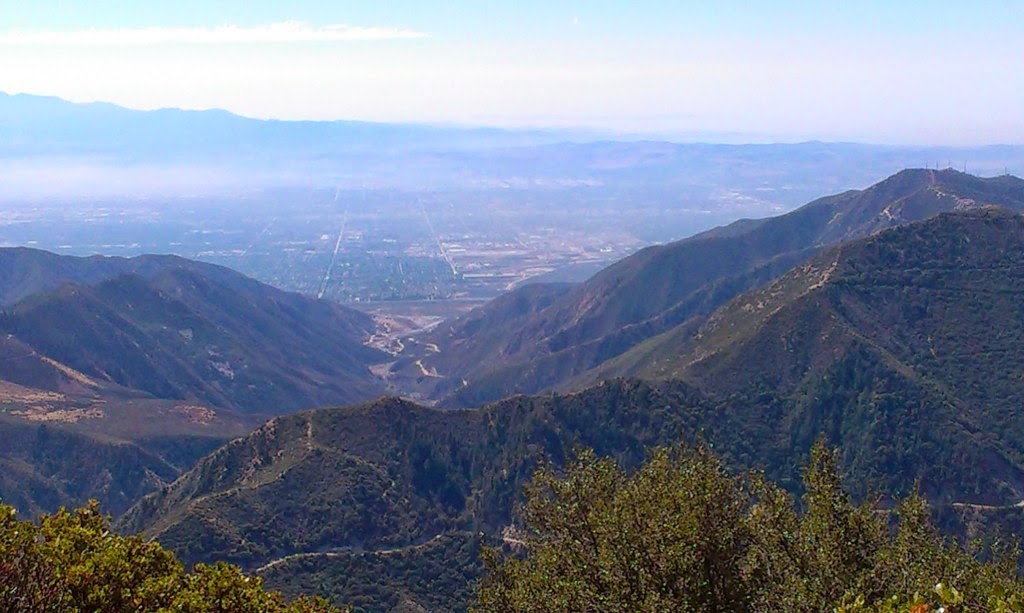
This was my second hike (of many) to Bedford Peak up the Silverado Trail in the Santa Ana mountains. The trail head starts just past the visitor's center on Maple Springs Road. Some of the photos are from the first trip. I made an effort to finish in under 3 hours by increasing my speed on the way down and had no trouble with that goal. The elevation gain according to my GPS was 1953' from the trail head, but many sites have the elevation gain above 2000'. Either way, the climb is steady from the start and enough to get the blood pumping. This is one of my favorite hikes that can be done in a morning. It is a single track trail until the very end when you have to take a dirt road about a quarter mile to Bedford Peak. There were lots of hikers and mountain bikers on the trail.
Monday, October 29, 2012
Saturday, October 27, 2012
Big Iron Mountain #1, Bonita Peak
HPS Star Emblem Peak
Hiked: 10/24/2012
Route 1 San Gabriel Mountains
Distance: 13.8 miles round trip on trail and use trail
Summit Elevation: 8007'
Prominence: 687'
Elevation Gain: 7021'
Elevation Gain (in Empire State Buildings): 5.61
Round trip time: 10 hours 18 minutes
Recommended water: 224 oz.
Parking/Fees: Adventure Pass
Difficulty: Very Strenuous
This was a beast of a hike and the namesake for this blog. Iron Mountain #1 is what I mean when I talk about hiking.
To get there (Iron Mountain #1), from Interstate 210, take the Azusa Avenue (SR 39) exit and go north up San Gabriel Canyon about 12 miles to where the East Fork Bridge turns right. Cross the bridge, and continue straight on E Fork Road. When you come to Shoemaker road, stay right on E Fork Road past Camp Williams. Keep going past River Community. When the road curves sharply to the right and becomes Glendora Mountain Road, keep going straight on E Fork, down a small hill and over a wooden bridge. Continue for about a half mile to the parking lot. From the parking lot, you can get a self issued permit to carry with you. There is a gated road near the permits, that is NOT where you want to go. There is another gated dirt road at the other end of the parking lot that follows the river. Go down that road a half mile to the Heaton Flats trail head.
The "easy" part of the hike is the first 4.5 miles to the Allison Saddle, following a groomed trail over a roller coaster ride of 5 bumps. Along the way, you traverse over the lower peak summit of Bonita Peak. The views from Bonita are not much different than the ridge after 3042'. I didn't find a register or benchmark on Bonita. The up and down theme continues throughout, as you lose elevation then immediately make it up. The hard part comes in the last few miles when the average elevation gain per mile increases sharply (1370'/mi). Immediately after the Allison Saddle is a very steep scramble up loose dirt and rocks. Beyond that, steady, upward climbing is broken up with some plateaus and occasional dips. The yuccas were not as much of a problem as I'd read in other trip reports. With care, they can mostly be avoided. The final 800' ascent seemed very difficult, maybe because I was tired. The rock scramble just before the summit was a relief from the loose dirt. The steep descent was difficult. I slipped no less than five times, ripping holes in my shorts. I might have moved slower but I was under time pressure to get down before nightfall.
This was my first trip to use the Garmin eTrex 20 GPS with topo maps. I am still learning how to use it, and only used three features: current elevation, direction, and tracking map. The tracking map was very helpful during the descent to make sure I was coming down the same way I went up. The elevation gave me a good idea of where I was on the mountain.
See Also:
Estimated Energy to hike Iron Mountain #1
Hiked: 10/24/2012
Route 1 San Gabriel Mountains
Distance: 13.8 miles round trip on trail and use trail
Summit Elevation: 8007'
Prominence: 687'
Elevation Gain: 7021'
Elevation Gain (in Empire State Buildings): 5.61
Round trip time: 10 hours 18 minutes
Recommended water: 224 oz.
Parking/Fees: Adventure Pass
Difficulty: Very Strenuous
This was a beast of a hike and the namesake for this blog. Iron Mountain #1 is what I mean when I talk about hiking.
To get there (Iron Mountain #1), from Interstate 210, take the Azusa Avenue (SR 39) exit and go north up San Gabriel Canyon about 12 miles to where the East Fork Bridge turns right. Cross the bridge, and continue straight on E Fork Road. When you come to Shoemaker road, stay right on E Fork Road past Camp Williams. Keep going past River Community. When the road curves sharply to the right and becomes Glendora Mountain Road, keep going straight on E Fork, down a small hill and over a wooden bridge. Continue for about a half mile to the parking lot. From the parking lot, you can get a self issued permit to carry with you. There is a gated road near the permits, that is NOT where you want to go. There is another gated dirt road at the other end of the parking lot that follows the river. Go down that road a half mile to the Heaton Flats trail head.
The "easy" part of the hike is the first 4.5 miles to the Allison Saddle, following a groomed trail over a roller coaster ride of 5 bumps. Along the way, you traverse over the lower peak summit of Bonita Peak. The views from Bonita are not much different than the ridge after 3042'. I didn't find a register or benchmark on Bonita. The up and down theme continues throughout, as you lose elevation then immediately make it up. The hard part comes in the last few miles when the average elevation gain per mile increases sharply (1370'/mi). Immediately after the Allison Saddle is a very steep scramble up loose dirt and rocks. Beyond that, steady, upward climbing is broken up with some plateaus and occasional dips. The yuccas were not as much of a problem as I'd read in other trip reports. With care, they can mostly be avoided. The final 800' ascent seemed very difficult, maybe because I was tired. The rock scramble just before the summit was a relief from the loose dirt. The steep descent was difficult. I slipped no less than five times, ripping holes in my shorts. I might have moved slower but I was under time pressure to get down before nightfall.
This was my first trip to use the Garmin eTrex 20 GPS with topo maps. I am still learning how to use it, and only used three features: current elevation, direction, and tracking map. The tracking map was very helpful during the descent to make sure I was coming down the same way I went up. The elevation gave me a good idea of where I was on the mountain.
See Also:
Estimated Energy to hike Iron Mountain #1
Saturday, October 13, 2012
Sitton Peak, Boy Scout Peak
Hiked: 10/12/2012
Distance: 9.5 miles round trip on trail
Summit Elevation: 3273' (Sitton), 3240' (Boy Scout)
Prominence: 773' (Sitton), 400' (Boy Scout)
Elevation Gain: 2150'
Elevation Gain (in Empire State Buildings): 1.72
Round trip time: 4 hours
Recommended water: 80 oz.
Parking/Fees: Adventure Pass
Difficulty: Moderate
Sitton Peak is one of the lower peaks in the Santa Ana Mountains, but still offers nice 360 degree views. It had rained the day before I went so the trail was damp and lush. It remained partly cloudy to overcast the whole day. There is a lot of forest cover at the beginning and plenty of vegetation, but very few yucca and thorny shrubs that plague other hikes. The trails are well groomed and easy to follow. From the 4 corners, I made a hard right onto Sitton Peak trail, although there was no sign.
I took a short detour to climb what I later learned was Boy Scout Peak at 3250' before Sitton Peak to photograph the boulders near the top (second shot). There are large outcroppings of boulders scattered around the mountains in every direction. After passing the bump, the trail descends a good distance to a saddle where you start the ascent of Sitton Peak. The use trail is a little brushy in spots, but not severe. Just remember the general location for the return trip. There is a benchmark at the top and great views into the San Mateo wilderness and down to Ortega Highway. I was glad to made it through a hike without smashing my phone or losing my sunglasses or anything else.
Distance: 9.5 miles round trip on trail
Summit Elevation: 3273' (Sitton), 3240' (Boy Scout)
Prominence: 773' (Sitton), 400' (Boy Scout)
Elevation Gain: 2150'
Elevation Gain (in Empire State Buildings): 1.72
Round trip time: 4 hours
Recommended water: 80 oz.
Parking/Fees: Adventure Pass
Difficulty: Moderate
Sitton Peak is one of the lower peaks in the Santa Ana Mountains, but still offers nice 360 degree views. It had rained the day before I went so the trail was damp and lush. It remained partly cloudy to overcast the whole day. There is a lot of forest cover at the beginning and plenty of vegetation, but very few yucca and thorny shrubs that plague other hikes. The trails are well groomed and easy to follow. From the 4 corners, I made a hard right onto Sitton Peak trail, although there was no sign.
I took a short detour to climb what I later learned was Boy Scout Peak at 3250' before Sitton Peak to photograph the boulders near the top (second shot). There are large outcroppings of boulders scattered around the mountains in every direction. After passing the bump, the trail descends a good distance to a saddle where you start the ascent of Sitton Peak. The use trail is a little brushy in spots, but not severe. Just remember the general location for the return trip. There is a benchmark at the top and great views into the San Mateo wilderness and down to Ortega Highway. I was glad to made it through a hike without smashing my phone or losing my sunglasses or anything else.
Saturday, September 29, 2012
Lookout Mountain
Hiked: 9/28/2012
Route 1
Distance: 4.5 miles round trip on use trail and cross country
Summit Elevation: 6812'
Prominence: 132'
Elevation Gain: 2900'
Elevation Gain (in Empire State Buildings): 2.32
Round trip time: 3 hours 30 minutes
Recommended water: 80 oz.
Parking/Fees: Adventure Pass
Difficulty: Moderate
Lookout Mountain #2 is a smaller peak near Mount San Antonio that was used in measurement experiments of the speed of light in the 1920’s. There is no official trail up the mountain, just firebreaks on two of the ridge lines and a use trail. The use trail is in fair condition, but I found it washed out in several places on the first leg, increasing the danger of a slide. Although the total distance is short, the elevation gain is severe in spots. I wanted to do this one to improve my navigational skills. I had to backtrack a couple of times on the way down, but never wandered too far off course. I was hoping to spot some bighorn sheep on the back side of Lookout, but saw none. Like Smith Mountain, I was the only human around. No one else was within miles.
The yucca plants drew blood twice and I lost my prescription sunglasses along the way. The back side of the bump is shaded and I put my sunglasses up on my hat. At my first rest stop, I noticed they were gone, and didn't find them on the way down. This was an expensive hike!
Route 1
Distance: 4.5 miles round trip on use trail and cross country
Summit Elevation: 6812'
Prominence: 132'
Elevation Gain: 2900'
Elevation Gain (in Empire State Buildings): 2.32
Round trip time: 3 hours 30 minutes
Recommended water: 80 oz.
Parking/Fees: Adventure Pass
Difficulty: Moderate
Lookout Mountain #2 is a smaller peak near Mount San Antonio that was used in measurement experiments of the speed of light in the 1920’s. There is no official trail up the mountain, just firebreaks on two of the ridge lines and a use trail. The use trail is in fair condition, but I found it washed out in several places on the first leg, increasing the danger of a slide. Although the total distance is short, the elevation gain is severe in spots. I wanted to do this one to improve my navigational skills. I had to backtrack a couple of times on the way down, but never wandered too far off course. I was hoping to spot some bighorn sheep on the back side of Lookout, but saw none. Like Smith Mountain, I was the only human around. No one else was within miles.
The yucca plants drew blood twice and I lost my prescription sunglasses along the way. The back side of the bump is shaded and I put my sunglasses up on my hat. At my first rest stop, I noticed they were gone, and didn't find them on the way down. This was an expensive hike!
Saturday, September 22, 2012
Smith Mountain
Hiked: 9/21/2012
Distance: 7 miles round trip on trail and use trail
Summit Elevation: 5111'
Prominence: 831'
Elevation Gain: 1900'
Elevation Gain (in Empire State Buildings): 1.52
Round trip time: 3 hours 15 minutes
Recommended water: 64 oz.
Parking/Fees: Adventure Pass
Difficulty: Moderate
Smith Mountain is a remote peak in the front range of the San Gabriel mountains. The fun and challenging part of the hike is the final half mile scramble to the summit, gaining over 800'. The scramble goes through several rocky sections but does not require any special equipment. The descent from the peak requires attention and poles would be useful (I didn't have any). I saw black bear scat in a few places but encountered no wildlife other than the usual lizards and birds. I cleared a few brown widow spider webs from the path. The use trail was in very good condition and previous hikers left helpful rock cairns where multiple paths were possible. I signed the summit log and noted that the last person to sign it was a full month earlier.
Distance: 7 miles round trip on trail and use trail
Summit Elevation: 5111'
Prominence: 831'
Elevation Gain: 1900'
Elevation Gain (in Empire State Buildings): 1.52
Round trip time: 3 hours 15 minutes
Recommended water: 64 oz.
Parking/Fees: Adventure Pass
Difficulty: Moderate
Smith Mountain is a remote peak in the front range of the San Gabriel mountains. The fun and challenging part of the hike is the final half mile scramble to the summit, gaining over 800'. The scramble goes through several rocky sections but does not require any special equipment. The descent from the peak requires attention and poles would be useful (I didn't have any). I saw black bear scat in a few places but encountered no wildlife other than the usual lizards and birds. I cleared a few brown widow spider webs from the path. The use trail was in very good condition and previous hikers left helpful rock cairns where multiple paths were possible. I signed the summit log and noted that the last person to sign it was a full month earlier.
Saturday, September 15, 2012
Santiago Peak
HPS Star Emblem Peak
Hiked: 9/14/2012
Distance: 18 miles round trip on dirt road (from Maple Springs Road)
Summit Elevation: 5689'
Prominence: 4387'
Elevation Gain: 2721'
Elevation Gain (in Empire State Buildings): 2.17
Round trip time: 6 hours
Recommended water: 128 oz.
Parking/Fees: Adventure Pass
Difficulty: Strenuous
Santiago is the highest peak in Orange County, CA, and the highest of the two peaks called Saddleback (the other being Modjeska). Because of the distance and mild grades on the road, the elevation was hardly noticeable. The peak is crammed full of radio towers and equipment so you can't get a panoramic view. It was satisfying to climb it because I see this mountain every day on my commute.
See also:
Santiago Peak via Holy Jim Trail
Santiago Peak via Telephone Ridge
Hiked: 9/14/2012
Distance: 18 miles round trip on dirt road (from Maple Springs Road)
Summit Elevation: 5689'
Prominence: 4387'
Elevation Gain: 2721'
Elevation Gain (in Empire State Buildings): 2.17
Round trip time: 6 hours
Recommended water: 128 oz.
Parking/Fees: Adventure Pass
Difficulty: Strenuous
Santiago is the highest peak in Orange County, CA, and the highest of the two peaks called Saddleback (the other being Modjeska). Because of the distance and mild grades on the road, the elevation was hardly noticeable. The peak is crammed full of radio towers and equipment so you can't get a panoramic view. It was satisfying to climb it because I see this mountain every day on my commute.
See also:
Santiago Peak via Holy Jim Trail
Santiago Peak via Telephone Ridge
Saturday, September 1, 2012
Mount San Antonio (Baldy)
HPS Star Emblem Peak
Hiked: 8/3/2012
Route 2
Distance: 8 miles round trip on road, trail, and use trail
Summit Elevation: 10064' (3067m)
Prominence: 6224'
Elevation Gain: 3900'
Elevation Gain (in Empire State Buildings): 3.12
Round trip time: 4 hours 20 minutes
Recommended water: 96 oz.
Parking/Fees: Adventure Pass
Difficulty: Strenuous
The highest peak in the San Gabriel mountains and Los Angeles County is Mount San Antonio, also known as Mount Baldy. This is a steep climb, especially the second half on the south ridge. I took a short break at the Ski Hut, which is roughly half way from Manker Flat. The trail spiders into many confusing use trails near the summit. My first trip up left my calves burning for three days. I also had trouble catching my breath on the first trip because I pushed myself too hard above 9000' . I paced myself better the second time after learning some respect for the elevation and it was much easier.
Update: 11/17/2013
Looking back at my very first trip report, I realize it doesn't have much information. This was before I had a GPS so I can't show the track or elevation profile. The statistics came from the Trails of the Angeles hiking book.
Update: 1/9/2019
I added a Google Earth GPS Track view from a winter ascent.
See Also:
Mount San Antonio North Backbone
Mount San Antonio Winter Ascent
Mount San Antonio via Devils Backbone
Hiked: 8/3/2012
Route 2
Distance: 8 miles round trip on road, trail, and use trail
Summit Elevation: 10064' (3067m)
Prominence: 6224'
Elevation Gain: 3900'
Elevation Gain (in Empire State Buildings): 3.12
Round trip time: 4 hours 20 minutes
Recommended water: 96 oz.
Parking/Fees: Adventure Pass
Difficulty: Strenuous
The highest peak in the San Gabriel mountains and Los Angeles County is Mount San Antonio, also known as Mount Baldy. This is a steep climb, especially the second half on the south ridge. I took a short break at the Ski Hut, which is roughly half way from Manker Flat. The trail spiders into many confusing use trails near the summit. My first trip up left my calves burning for three days. I also had trouble catching my breath on the first trip because I pushed myself too hard above 9000' . I paced myself better the second time after learning some respect for the elevation and it was much easier.
Update: 11/17/2013
Looking back at my very first trip report, I realize it doesn't have much information. This was before I had a GPS so I can't show the track or elevation profile. The statistics came from the Trails of the Angeles hiking book.
Update: 1/9/2019
I added a Google Earth GPS Track view from a winter ascent.
See Also:
Mount San Antonio North Backbone
Mount San Antonio Winter Ascent
Mount San Antonio via Devils Backbone
Subscribe to:
Posts (Atom)