Hiked: 7/16/2015
Distance: 4.1 miles round trip on trail
Summit Elevation: 4920'
Elevation Gain: 540'
Elevation Gain (in Empire State Buildings): 0.43
Round trip time: 1 hour 50 minutes
Recommended water: 20 oz.
Parking/Fees: Red Rock Pass ($5/day or $15/week)
Difficulty: Easy
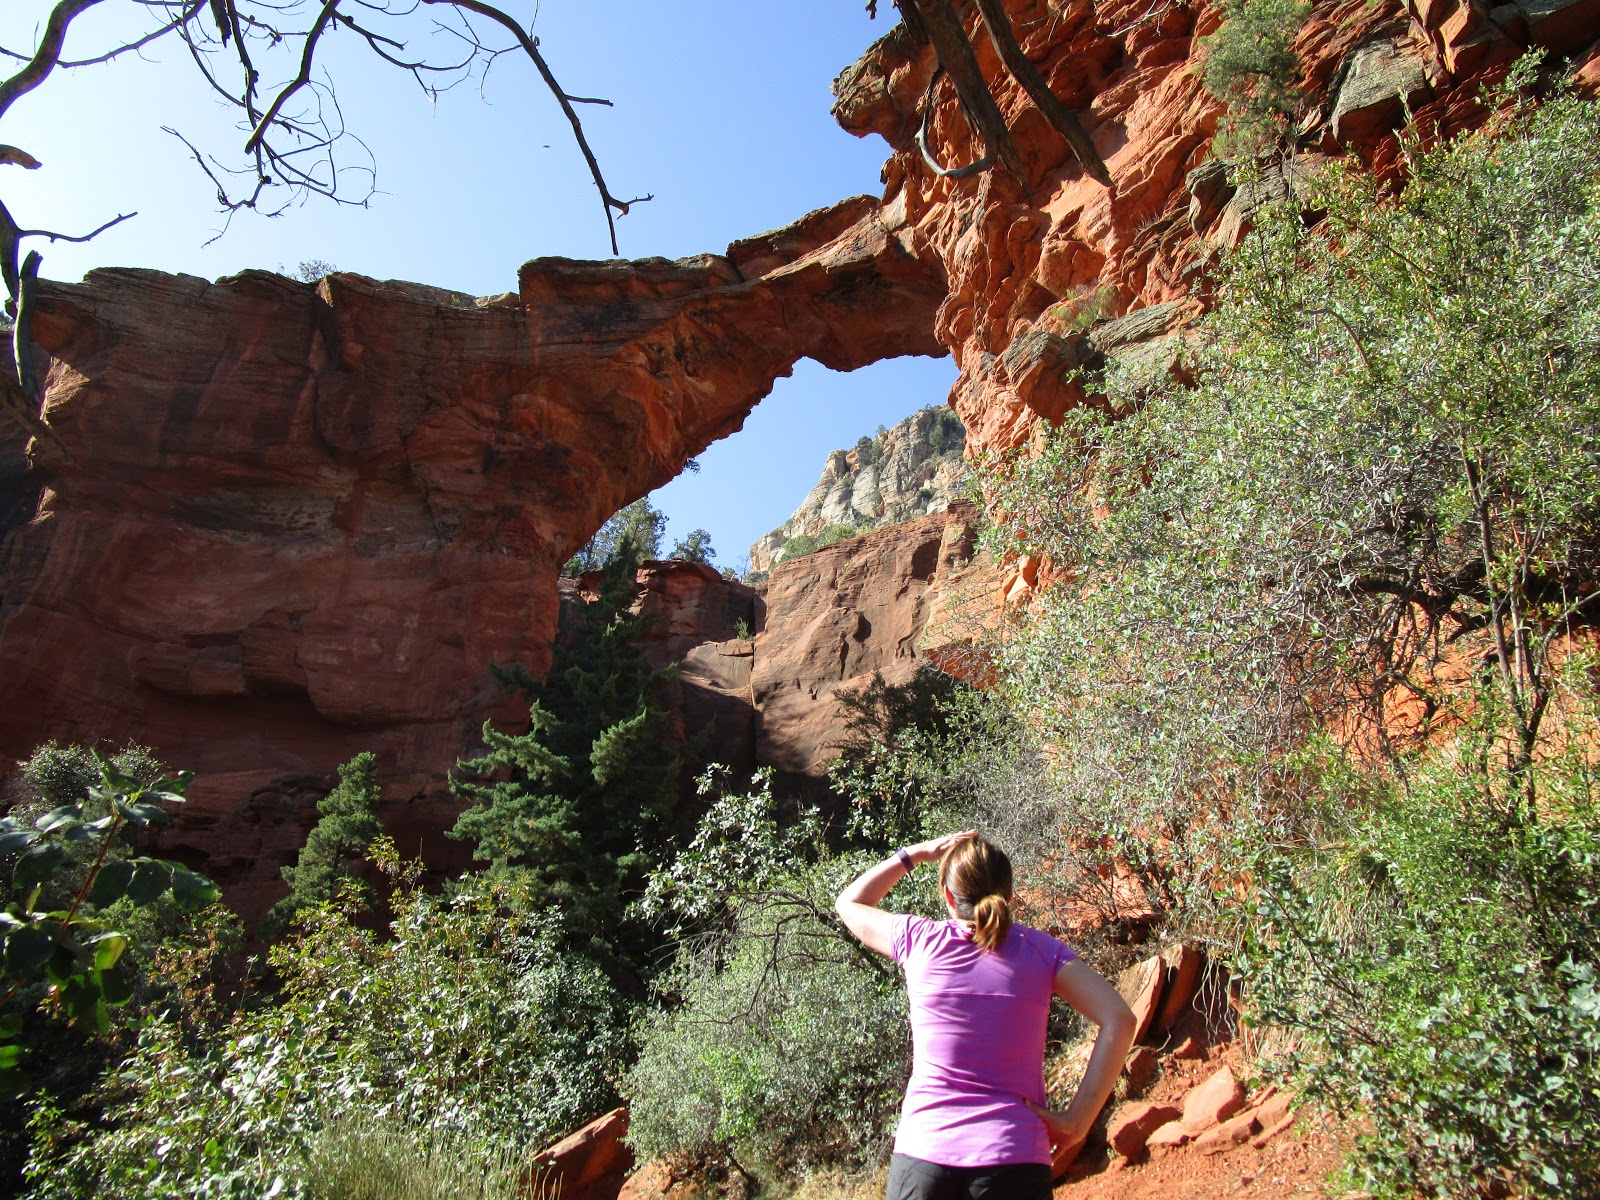
My wife joined me for a couple of hikes in Sedona, AZ. We were hanging around in Arizona while our daughter was at flight camp at Embry-Riddle Aeronautical University. While she was flying Cessnas, we hiked out to Devil's Bridge. We started at Dry Creek Vista trailhead and headed up the dirt road to the junction with Devil's Bridge Trail. If you have a high clearance vehicle, you can cut the distance in half by driving a mile or so down the rough road. The Devil's Bridge Trail is a wide old jeep trail and weaves through pines and junipers around the backside of Capitol Butte. A few hundred feet before reaching the natural sandstone bridge, the trail splits. The right trail heads to the top of the bridge and the left trail heads below it. We went to the top first to get the required photos. Even though we were early, there were already a few people there. More arrived while we were there and we met about two dozen on their way up while returning. If you don't want to wait in line for photos, I suggest going early. The bridge itself stands about 50' off the ground and is about 8' wide at the narrowest point. It looks more dramatic than it is, but is a really interesting natural feature well worth the short hike.
Start of the rough road toward the Devil's Bridge Trail junction
Start of the Devil's Bridge Trail
A balanced rock near one end of Capitol Butte
Trail split, left goes below the bridge, right goes to the top
Hiked: 7/13/2015
Distance: 2.2 miles round trip on trail
Summit Elevation: 2606'
Prominence: 1176'
Elevation Gain: 1190'
Elevation Gain (in Empire State Buildings): 0.95
Round trip time: 1 hour 10 minutes
Recommended water: 32 oz.
Parking/Fees: Free at Squaw Peak Drive
Difficulty: Easy
Piestewa Peak, known as Squaw Peak until recently, is one of the most popular hikes in the Phoenix area. It is the second highest peak in the Phoenix Mountains, after Camelback, Piestewa Peak is named in honor of Army Spc. Lori Ann Piestewa, the first known Native American woman to die in combat in the U.S. military, and the first female soldier to be killed in action in the 2003 Iraq War.
I drove to the trailhead on Squaw Peak Drive and enjoyed the free parking. There were some hikers heading up and some coming down, but the 103 degree heat of summer in Phoenix had most sensible people indoors. I was lucky that early morning clouds saved me from direct sunlight on the ascent. The trail is well defined with steps built out of the rock most of the way, though there are some rough spots. It starts off at a moderate incline and climbs to a saddle before getting steeper. In a couple of spots, there is some mild exposure and hand rails have been installed, similar to those found on Camelback. To gain the summit, you need to climb about a 15' section of class 2 with no assistance. The summit has a battered benchmark and you can barely make out the "Squaw" stamped into it. I was alone on the summit and found no register. There are no flat spots on top, just jagged rock, and I nearly fell over trying to get a photosphere with my phone. Time will tell how it turned out. [update: photosphere had gaps from my stumbling and was rejected by Google]. The descent was no problem, except for the sun that beat down on me without mercy. I was glad to get back to the car and cool off in the AC. I took no breaks, other than photos and a brief stay at the summit. Since we were on vacation and I had some family hikes planned, this would likely be my only solo hike for the week.
Hiked: 7/3/2015
Distance: 7.4 miles round trip on dirt road and trail
Summit Elevation: 2897'
Prominence: 1454'
Elevation Gain: 2059'
Elevation Gain (in Empire State Buildings): 1.64
Round trip time: Untimed
Recommended water: 64 oz.
Parking/Fees: Free at Lake Poway ($5 from April-October on weekends/holidays)
Difficulty: Moderate
Anand was interested in tackling a hike with Rod and I, so I offered up a few moderate hikes I'd done before that would reward him with nice views and a sense of having climbed a mountain. Something neither too easy nor too hard. Of that list, he picked Woodson Mountain since it was on a well defined trail and didn't require any climbing (not counting the summit block). It gave me the chance to atone for missing the summit block on my first visit, pointed out to me by Adam Walker when he found the class 3 block and benchmark. My beta at the time was lacking and like most first time visitors, I was more interested in Potato Chip Rock. I didn't bother timing this trip or breaking out the GPS. We would be moving at whatever pace was comfortable for the group. We started when Lake Poway opened near the snack shop. The early start was to avoid heat, snakes, and crowds. That strategy worked for the heat and snakes, but not the crowds. There were dozens of hikers ready to go early in the morning and a steady stream followed. I can't remember a busier trail, including the always crowded Cowles Mountain. Low clouds covered everything at the start and blanketed us up to around 2000'. Above that, we had picturesque views all around. This was Anand's first hike with significant gain and he took rest breaks as needed on the way up. Rod and I took those opportunities to do some bouldering, with many fine climbs next to or just off the trail.
Tarantula near the start of the trail
Anand and Rod at a switchback
On a trailside boulder
Rod climbing a boudler
Looking down from another boulder
Above the low clouds
When we got to Potato Chip Rock, there was a line and we queued up for photo ops. We really wanted to get Anand up there, but he headed up toward the summit in search of restroom facilities. The line moved slowly since a lot of people were afraid to make the 3 foot jump from one boulder to Potato Chip Rock. Rod and I looked for Anand when we got to the front of the line, but couldn't find him so we took a few shots and dropped down. We met him coming down from the summit as we went up in search of the somewhat hidden block with the benchmark. He decided to wait for us at Potato Chip Rock. It took a little searching around the buildings until we found the right block. The access ladder was behind a building and we had to carry it to the starting spot. A short class 3 climb later, we found the benchmark and multiple reference marks. The cement structure on top was hollow with no apparent purpose. With that bit of business concluded, we met up with Anand again, and found the line for Potato Chip Rock had grown to about 50 deep. Rod wanted more photo ops, but not the hour long wait that would have required. We descended back into the clouds, which kept the temps and hydration needs down, and congratulated Anand for making the entire trip. This is not really his cup of tea. When the sore muscles heal, all he will remember are the views and making it to the top, maybe.
At the end of Potato Chip Rock
True summit block
Rod figuring out the way up
The elusive benchmark
View south from the summit, North Iron and Iron Mountain
HPS Star Emblem Peak
Hiked: 6/26/2015
Distance: 9.2 miles round trip on trail
Summit Elevation: 9648' (Pine #1), 9575' (Dawson), 10064' (3067m, Mt. San Antonio), 9988' (West Baldy)
Prominence: 848' (Pine #1), 424' (Dawson), 6224' (Mt. San Antonio)
Elevation Gain: 4725'
Elevation Gain (in Empire State Buildings): 3.78
Round trip time: 6 hours 45 minutes
Recommended water: 168 oz.
Parking/Fees: Adventure Pass
Difficulty: Strenuous
The north backbone is a less frequently used route to climb Mt. San Antonio (Baldy). The ridge is a high altitude roller coaster starting on Blue Ridge Road and running over Pine Mountain #1 and Dawson Peak, each towering over 9000'. The northern slopes usually retain snow late into the year, but since there wasn't much snow this winter, the route was clear. The gate past Guffy Campground was open so we drove to the trailhead at a small turnout below Wright Mountain. The weather was perfect. While it was scorching at sea level, it was pleasant in the high country. The north backbone trail starts by dropping a short distance to a saddle, then climbing up to the first bump along Pine Mountain #1 ridge. Beyond the first bump is the more difficult section of Pine ridge. It is loose with tiny scree and a few class 2 sections where both sides of the ridge drop away more than 500'. However, the trail is in good shape and the danger is low unless you are careless. The mountain itself is almost completely covered with pines, ranging in age from new to ancient. There were a couple of bighorns hanging out on an adjacent ridge. When we arrived at the Pine summit, we got a good view of the rest of the backbone. Dawson hovered on the left and Mt. San Antonio blocked out the north, dwarfing the normally imposing Iron Mountain #1 (8007'). There were great views of everything within 50 miles. I could even make out the white dome of the Mt. Wilson observatory.
Start of the north backbone trail
First bump on Pine Mountain ridge
First view of Pine Mountain #1
Sean working through a class 2 section
Bighorns on Pine
Strangely curled trees
The remaining goals from the Pine Mountain summit
We descended Pine and started up the Dawson ridge. As we passed over the top of Dawson, we spotted a second, larger group of bighorns. We got a couple of photos before they bolted down the southwest side. Dawson was also covered mostly in pine trees. I think the high back country is the nicest part of the range. We took a short break on Dawson Peak before gearing up for the third segment up Mt. San Antonio. From the north, you get a better sense of the incredible size of Baldy. We started down Dawson and cached some water in a hollow log. The drop down to the Dawson-Baldy saddle is about 700', followed by a 1200' climb in just over a half mile with practically no shade. The elevation and early morning kept the heat in check. On the summit, one group was hanging out in a wind break, and soon other singles and groups made their weary way to the top. Sean decided to skip West Baldy, but I had never made the side trip so I dropped my pack and took off. I brought binoculars to look around for the plane wreck from West Baldy, but left them in my pack. There were no official marks or register on West Baldy, but I got a different perspective and a great view down Cattle Canyon. Then I returned to Baldy and we hung out on the summit for about 45 minutes before heading back.
Sean on the Dawson Peak summit
Dawson register
The bulk of Baldy
Bighorns near Dawson Peak summit
Sean got this shot of the bighorns
Sean climbing Mt. San Antonio
Knocking on Baldy's back door
The lone North Backbone trail sign, several hundred feet below the summit
Looking toward West Baldy from just below the Mt. San Antonio summit
Mt. San Antonio summit
Sean and I on the summit
West Baldy 360
Unlike the other three main routes to Mt. San Antonio that approach from the south, the north backbone exacts a price on the return trip, about 1400' of gain. As we got to the Dawson-Baldy saddle, we met the first group of people that were not on the Baldy summit. Three hikers were on their way up the north backbone, having started a couple of hours after us. Sean had met one of them before. We chatted about the trail and other adventures for a while before wishing them well and moving along. We picked up our water cache on Dawson, finished that climb, then continued the roller coaster up the south side of Pine. The final challenge was surfing the scree down the north side of Pine. Though difficult to reach, the remoteness and unmatched views make this my favorite route up Mt. San Antonio.
View to Claremont from West Baldy, Saddleback distant left
Iron Mountain #1 and Rattlesnake Peak from Dawson ridge